Color changing flowers science experiment for kids – fun nature science project for Mother’s Day, Spring (or any time of year)!

Imagine lining up at the supermarket, and you see a bunch of stark white gerbera daisies on sale for $1.66. What would you do? Me? I couldn’t not buy them, especially since I’d been hankering to try a little colour changing nature science experiment that would be just perfect for a bunch of white gerberas like these.
Suitable for
You could try this as a hands-on observation of nature activity with preschoolers, especially if you don’t mind food colouring stains on their fingers. Kindergarteners and older kids might like to experiment by changing just one variable at a time to see how this impacts the results.
When we did this activity, Jewel was 5 years and 5 months old, and Bumble Bee was 3 years and 1 month.
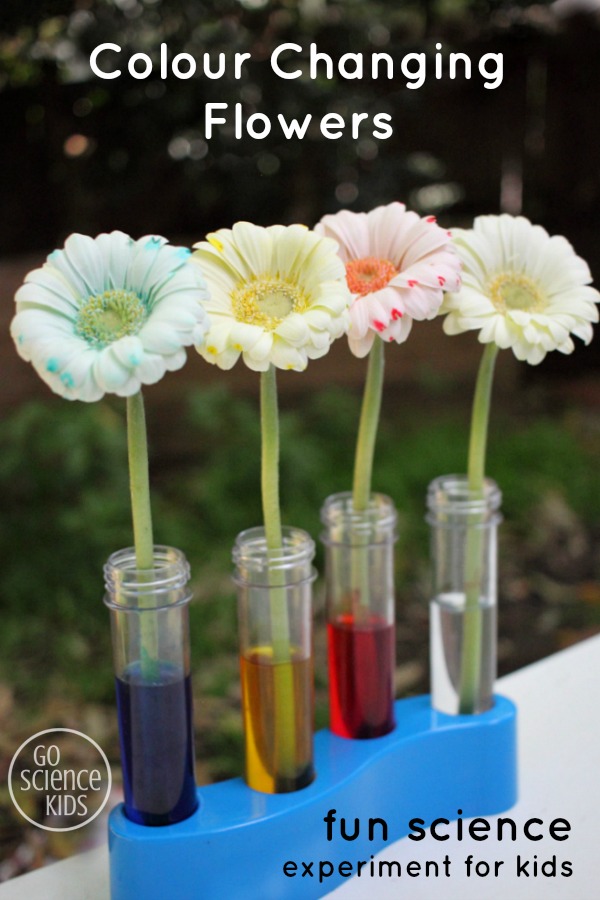

Colouring or dyeing flowers is quite easy to do. It’s a fun science experiment that kids of all ages can do at home, with visible (and pretty!) results. All you need to do add food colouring and water to a vase or other receptacle and the flower will absorb the coloured water up through its stem, in a process called transpiration. (We’ll delve more into the science behind it a bit further down…)
To dye or colour flowers at home, you need:
- white flowers (we used gerbera daisies)
- test tubes with stand (or other equal sized receptacles)
- water
- liquid food colouring (with droppers)
We used white gerbera daisies. I’ve heard that white carnations also work well for this experiment. If you’re keen, you could try several types of white flowers, and see which one works best! Let us know what you find out! (Or see our results here).

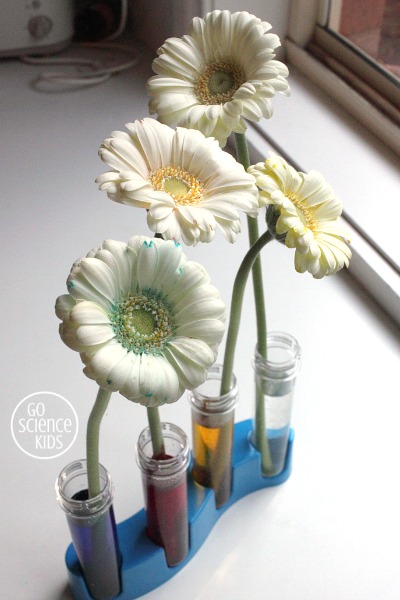
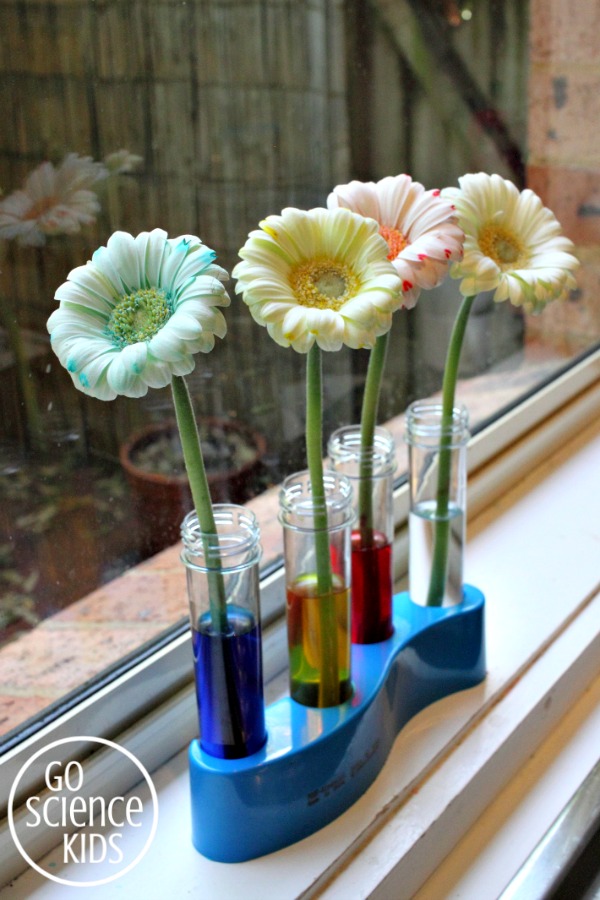
Instead of a traditional vase, we used the test tubes from one of our science kits. (You can read our review of that kit here, in case you’re interested.) The test tubes added a fun science feel to the experiment! And it also meant that we could easily keep several aspects of the experiment consistent, such as the volume and depth of the water.

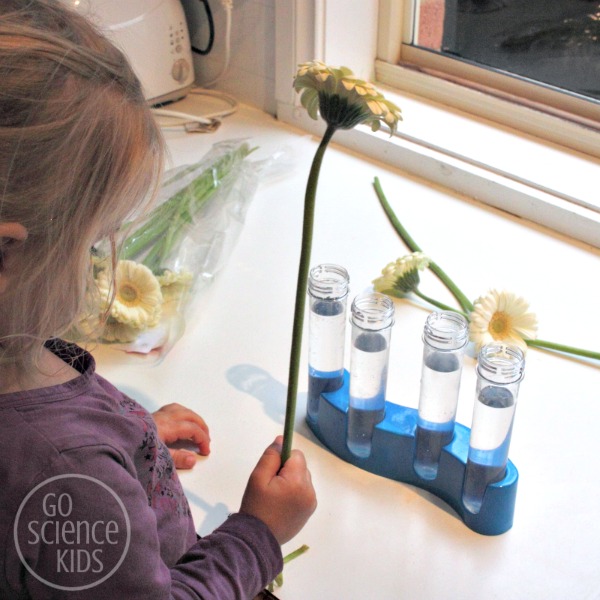
Five year old Jewel carefully added ten drops of blue, red and yellow food colouring to three of the test tubes, keeping the fourth test tube as a control. Jewel accidentally added an eleventh drop of food colouring to the last yellow test tube, so she went back and added an extra drop of food colouring to the blue and red test tubes, to keep the experiment ‘fair’. Jewel and I have been talking a lot about the importance of making science experiments ‘fair’ by keeping most aspects consistent so we can focus on the effects of just one variable, and this was the first time that we’d had the opportunity to explore this theory in practice.
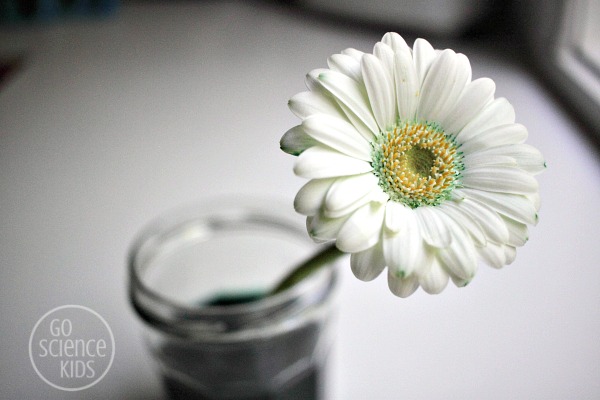
Of course, three year old Bumble Bee didn’t want to be left out of all this food colouring floral fun. I didn’t want to let her participate in (aka ruin) Jewel’s experiment, as I knew Bumble Bee wouldn’t have the fine motor or self control to measure out drops of food colouring one by one, so instead I filled a random glass jar with water, and let her squirt a healthy dose of green food colouring into it, as her own little side project.
We trimmed all the flowers by the same amount (about an inch), and added them to Jewel’s test tubes and Bumble Bee’s glass jar. And waited…..
Fun Science Facts
Flowers absorb water through the xylem, which is a tissue of thin tubes found inside the stem. Water is transported up the xylem to the various parts of the plant, including the flower. Various factors help water to move up the xylem, including molecules in the xylem that attract the water molecules, solar energy and transpiration. Transpiration occurs when sunlight evaporates water from flowers, leaves and stems. This loss of water creates a vacuum at the top of the xylem tubes, which encourages water to be sucked upwards to fill the empty space (not dissimilar to the movement of water up through a straw when someone is taking a sip.) Read more here.
If you are especially interested in the botanical aspects of gerbera daisies, then you might like this page, which has some fascinating close-up photos. Gosh the world is wonderful when you look at it through a macro lens!
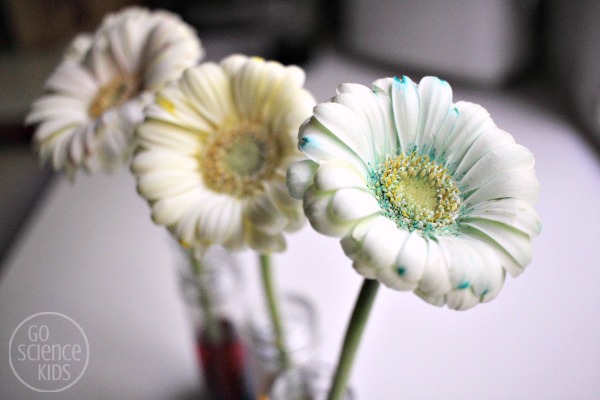
A few hours later, after bath and dinner, the girls squealed when they saw that the first flecks of blue colour had appeared.

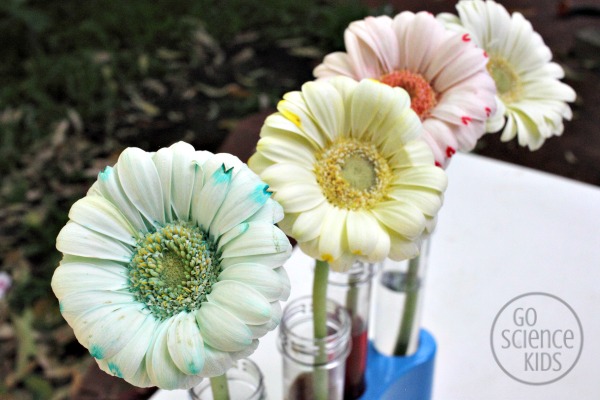
The next morning (about 16 hours since the start of the experiment), the girls were delighted to discover these lovely, soft, pastel shades.

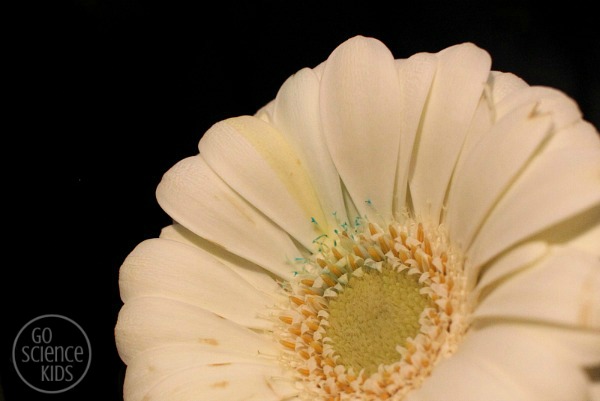
The blue was the most promising, but in all cases, interestingly, the strongest colour appears in the tiny florets around the denser central disc, just at the edge of where the larger petals begin. You can see this in Bumble’s green flower below too. The outer petals remained white (except for a few tips), whereas the tiny florets took on a strong green coloured ring.
We trimmed the stems about an inch, putting them back in the same water.
Fast forward a few days (to about 3.5 days since the start of the experiment), and here is what Jewel’s four flowers look like. (Sorry for the photo overload, but they were so pretty!)
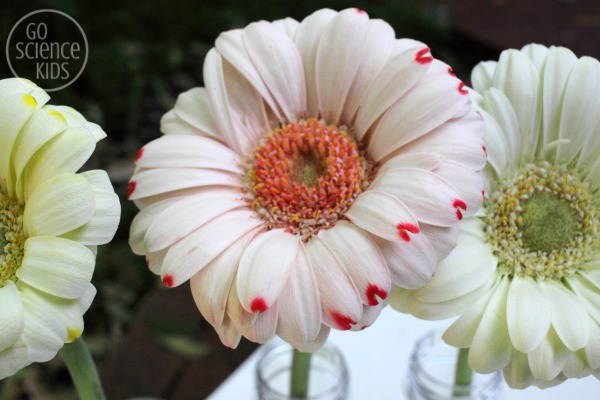


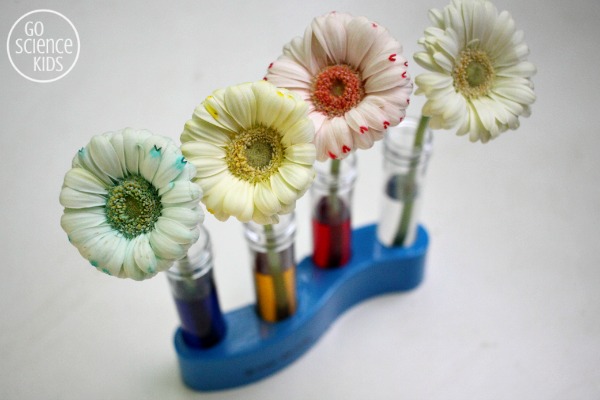
I think the blue is the most stunning, simply because it isn’t a colour that you see in nature. At the end of the experiment, Jewel judged the red to be the most vibrant. All in all however, I would say that the three colours all worked quite well, compared to the (still white) control flower.
Have you tried the colour changing flowers experiment at your place? How did it turn out?
If you are interested in more nature or flower science experiments, you might also like:
- Dyeing bicoloured flowers (which is similar to this experiment, with a cool twist).
- Our follow up experiment to find out which flowers absorb the most vibrant colours.
- Try this vase swap trick to make multicoloured chrysanthemums in red, white and blue.
- We’ve also made Borax crystal flowers, which is a completely different experiment altogether, but fun nonetheless.
You might also like to follow our Go Science Kids and Fun Science for Kids boards on Pinterest.
And, of course, you can always subscribe to our newsletter, to receive all our latest activities via email. We’d love to have you join us!

* This post contains affiliate link(s) to similar products used. An affiliate link means I may earn a referral fee or commission if you make a purchase through my link, without any extra cost to you. It helps to keep this little project afloat. Thank you so much for your support.