
Welcome back to the third week of the 28 Days of Hands-On STEM activities for Kids series. This week is all about computer science – Coding for Kids – which is quite timely, as we’ve just started introducing our 5.5 year old daughter Jewel to coding, or more specifically, to HTML only a few weeks ago.
I thought perhaps I could share how we are going so far.
My husband is the computer scientist in our household, and he’s keen to pass on that love to Jewel and Bumble, when they are ready. Jewel is just about there!
His rough timeline is as follows:
Step 0: Before we start, it’s best if kids can recognise upper and lower case letters, and be able to write basic sentences. Jewel is at this point now.
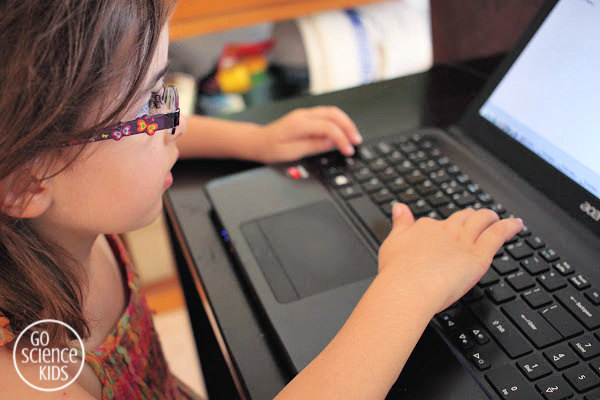
Step 1: Start a virtual journal (I’ll show you how below), which can be a place for kids to write about whatever topic they like. There might not even be a topic! Jewel just seems to be writing random sentences at the moment, and that’s completely fine. Her kindergarten-level phonetic spelling is OK too! Just getting familiar with typing, the layout of the letters, using the space bar, understanding that the words will automatically wrap as you type, using Enter to change paragraph, using Shift to create capital letters and other basic things like that (which, as adults, we tend to do automatically) is a great introduction to using computers.
Step 1a: We noticed that Jewel takes forever to find certain letters on the keyboard, which is making typing slow and slightly frustrating. Of course, typing her journal and gaining familiarity with using a keyboard will help this! We’re also thinking of introducing a basic touch typing game, so that she can learn to touch type. We’re going to try this one.
Step 2: Introduce some basic HTML coding to your journal. (See below for examples.) The fun thing about HTML is that it gives an instant response. Kids can get the hang of adding HTML tags to modify certain parts of their journal and instantly see the effect they’ve created. Because there is no end goal in mind, kids can tailor it to their own likes and interests, and learn just by playing around. (Which is how kids learn best, IMHO). Their skills can grow overtime, at their own pace. And their journal will likely become fancier as they learn new ‘tricks’. (I’m imagining Jewel’s journal may become quite gaudy, as she tries out various html tags. That’s part of the fun. And I can always introduce her to simplicity in design concepts at a later point 🙂 ).
Step 3: When she’s ready, the next step we’re planning is to introduce Javascript, so Jewel can learn to create interactive components to her journal. But hold on to your horses, because she might not be ready for this step for a few years yet. (She is only 5…)
What I like about this approach is that it’s very child-led and open-ended. Kids can steer their virtual journal in whatever direction they want, and it can grow as their writing, typing, HTML and design skills grow.
I also like that their journal acts as a private webpage. There’s no server associated with this ‘site’. It’s not public, so there’s no security issues, no hosting concerns, etc. If she wants to share it publicly later on, she can. But that may not be for a few years yet, at which point we can address internet security, server administration, etc.

How to start a virtual journal for kids and introduce HTML
1. Start by creating a new local folder on your computer that’s easy to find (perhaps on your desktop).
2. Open up a new text document. (Note: Don’t use Word. You need to use a program that saves plain text files, like Notepad). Save the (blank) document as ‘.html’ in your new local folder. The ‘.html’ tells your computer that the document is a web page.
3. Let your kids type away! They can write whatever they want. Spelling doesn’t matter (at least, not at this point in our household). Save the file (but don’t close).
4. Go back to your local folder, and double click on the file, which will open it up (as a separate tab) in a web browser. Now you can see your masterpiece ‘live’. At this point, it will look pretty plain.
5. Now we can experiment with coding and making it pretty. Go back to your original file and start to add some html tags. Here are some easy tags that we’re starting with:
5a. If you want to add an image, you must copy it first into the folder that you’re working from.
6. Click save, and then go back to your web browser and click refresh (F5). You should be able to see all your amazing effects. It’s like 1995 all over again!
7. Play around some more! Remember to keep saving your file, and click refresh in your browser to see any new changes take effect.
This is the code that Jewel has so far in her virtual journal. (Note: I’ve changed the girls’ names to their blognames, but have left everything else the same.)
<span style="color: blue;"><h1>jewel is 5 and a haf. and i love ice-cream! i love my little sist bumble a lot!

Jewel's website ! i love to play with my little sister bumble!i love to play everything that ather kids like to play! a lot!</h1>
<img src=”mysister.JPG” width=”20%”></img>
<img src=”icecream.jpg” width=”10%”></img>
once upon a time ther was a
And this is how it looks on her webpage.


As you can see, it’s very much a work in progress, and probably always will be. But she’s learning, and having fun, and I reckon that’s awesome!
To create basic code, you need an opening tag (<your code>) before the text that you want to change, and then a closing tag with a forward slash (</your code>) afterwards. So if you want to make the word example bold (or strong as it’s called in html), then you would wrap the word example in code like this: <strong>example</strong>. Whilst that might sound complicated, kids soon get the hang of it, probably faster than many adults would.
Here are some fun and easy html tags that you might want to try.
| Type | HTML Coding | Example |
|---|---|---|
| Heading 1 | <h1>example</h1> |
example |
| Bold | <strong>example</strong> | example |
| Italic | <em>example</em> | example |
| Blue Font Colour | <span style=”color: blue;”>example</span> | example |
| Pink Font Colour | <span style=”color: pink;”>example</span> | example |
| Aquamarine Font Colour | <span style=”color: aquamarine;”>example</span> | example (Jewel’s favourite colour) |
Note: Whilst phonetic spelling is fine for the content (if that’s developmentally where your kids are up to), unfortunately it’s not OK for the html coding. That will need to be 100% correct to work. But this is all part of the trial and error process. “Why didn’t it work. Let’s go back and have a look. Does yours look exactly the same as here? What about if you try something else?”
I personally love how you can change the font colour using the colour name or colour number. (But mind that the colour name must be written exactly, with no spaces). Here is the list we’ve been using with all the font colour name options. Unfortunately (for non-US readers), most of the html code uses American English spelling. So it’s ‘color’ instead of ‘colour’. Non-US kids will just have to get used to recognising that they must use different spelling in different circumstances.
You’ll also notice that to change to font colour, you need to wrap the code in <span> tags. There’s lots of tricks to HTML like this, and they are easiest to remember once you start using it repeatedly. It’s a lot like learning a new language – it’s difficult at first, but you soon start to get the hang of it.
Adding an image is another one that’s slightly tricky. You need the <img> tags, plus you’ll need to specify the source (src). First you’ll need to save the image in your new folder, the same folder where your text file and website are saved. Next, you can add it to your text file by adding the <img > code, and specifying the source of the image. An example is probably the easiest way to explain. So if your image was called 1234.jpg, then you’d add <img src=”1234.jpg”></img>. (Note .jpg and .JPG are not the same: capitals matter.)
Jewel is loving having her own website, and I’m loving her having wholesome fun on the computer. She sees her parents working on computers all the time, and this is her chance to try it out for herself. Plus, I secretly love reading what’s she’s written. I can’t want to read what she’s going to write next!


This post is part of the 28 Days of Hands-On STEM Activities for Kids blog hop that’s running all this month. Head over for more fun Coding for Kids activities to try. Which one will you try first?
And keep an eye out for next week’s mini-theme: STEM on a Budget!