
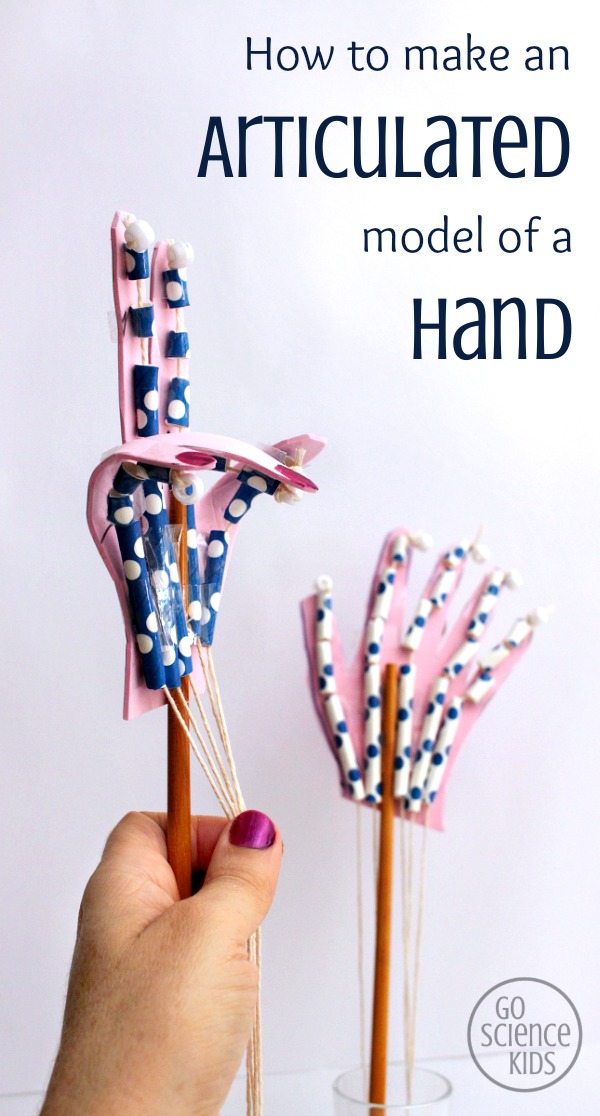
Jewel and I made this cool articulated hand! But before I show you how to make one for yourself, let me tell you a little story explaining why.
A few months ago, Jewel fell over awkwardly and cut her little finger. It was a small cut, but something about it felt wrong. It just looked… strange. So after some deliberation, we decided to take Jewel to the hospital. It was evening by then, and the emergency department was busy with broken limbs, head injuries, suspected heart attacks, and goodness knows what else. So I felt about the size of an ant when I presented my 5.5 year old daughter with a tiny cut on her pinky finger.
The nurses ummed and ahhed. The doctors ummed and ahhed. The hand surgeons ummed and ahhed. The cut was in a tricky spot. No one wanted to send us home, just in case.
Jewel went into surgery the next day. As it turned out, Jewel had somehow managed to sever two tendons, a nerve and an artery, all in that tiny, not-even-1cm cut on her pinky finger. And that is the story behind why Jewel is interested in hand anatomy just now, and why we decided to make an articulated model of a human hand.
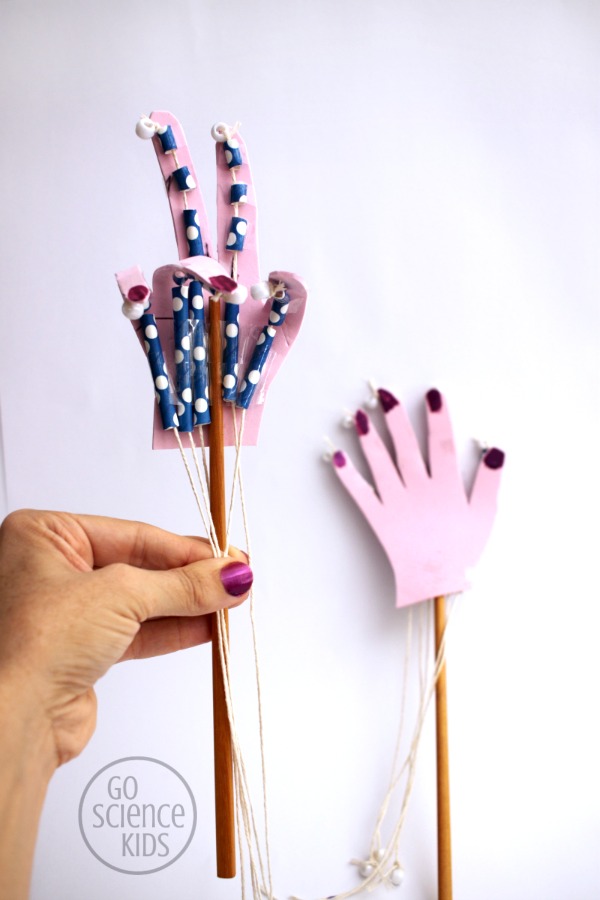
Jewel made this first (above) hand model, with a little help from me. It helps demonstrate how tendons work inside your hand, and how severing tendons could affect more than just that one joint.
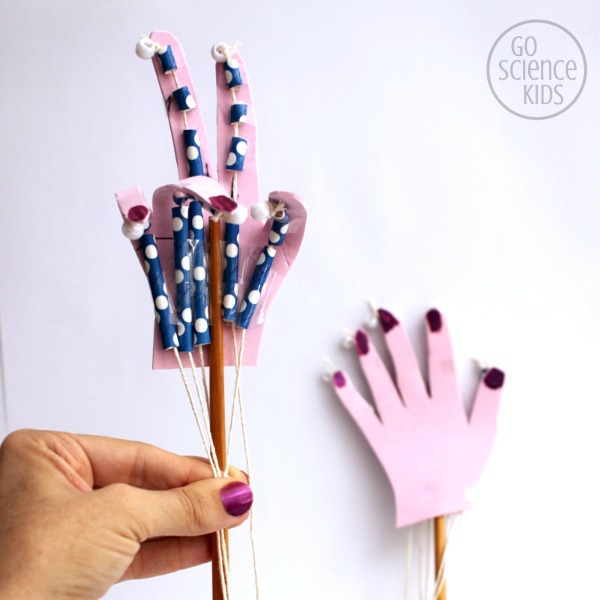
I made a second hand, with a few minor modifications and the fingers now bend really well.

Suitable for
This craft is a tad fiddly. 5-6 year olds, like Jewel here, will likely need some help. Older kids might be able to do it by themselves.
How to make an articulated hand
We used:
- craft foam
- paper straws
- sticky tape
- white pony beads
- twine (or string)
- scissors
- chopsticks
- pen
- nailpolish (optional)
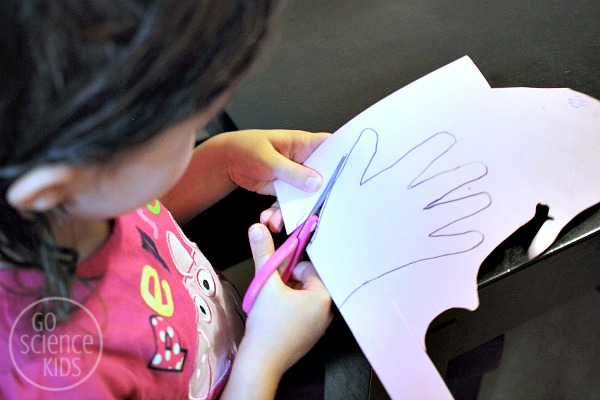
Step 1: Trace your hand on craft foam, and cut it out.
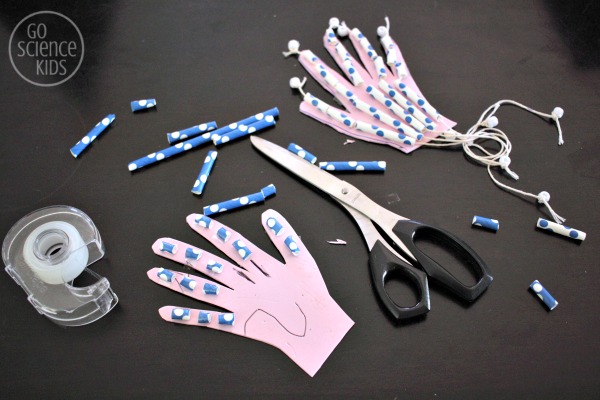
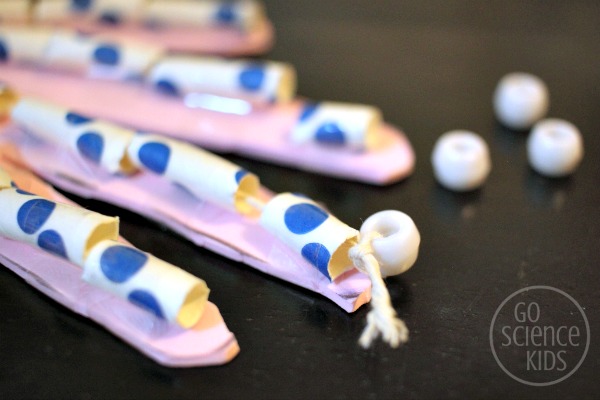
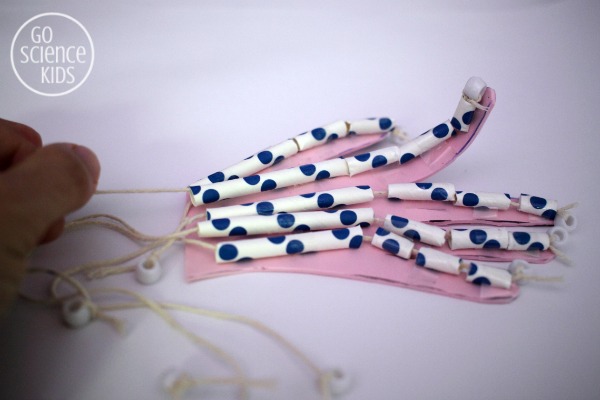
Step 2: Cut paper straws into small pieces, and stick them on the hand and fingers to represent the bones and the tendon sheaths that are attached to them. (Leave gaps between each piece, as this will allow the fingers to bend later.)
Feel your hand and see if you can work out where the major bones are. We discovered there should be three small bones for each finger, and only two for the thumbs. Each set of finger and thumb bones connect up to corresponding longer bones in main part of the hand.
Jewel chose to attach her straws with small pieces of sticky tape. You could also use glue if you prefer.

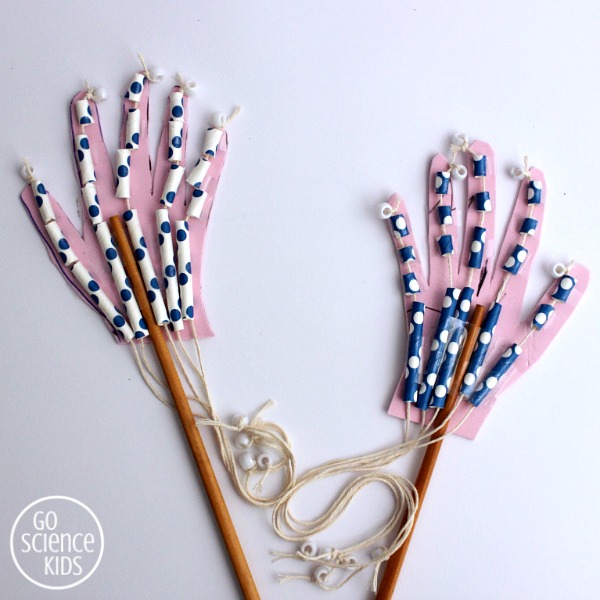
Hint: when I re-did this step for our second hand, I discovered it is better if you leave a larger gap between the straws (as you can see below). This made a huge difference in how well the fingers bent later on.
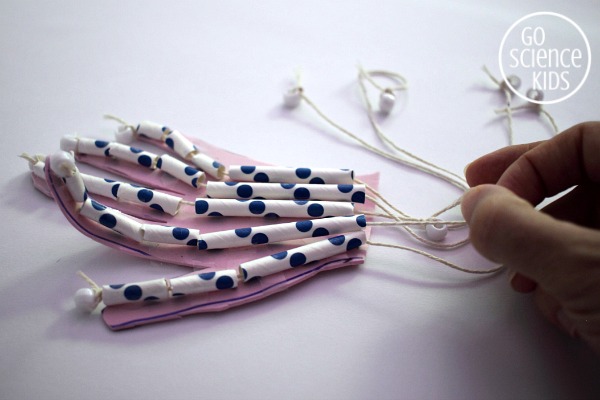
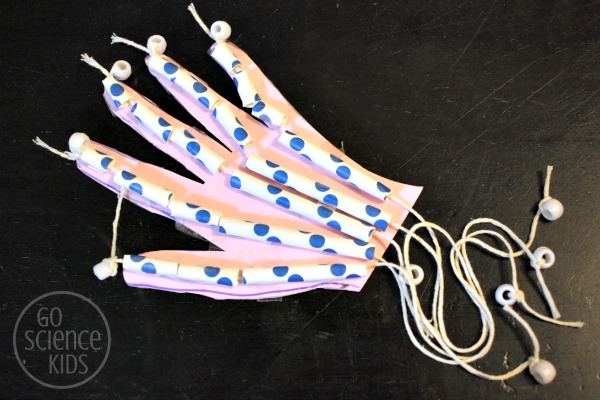
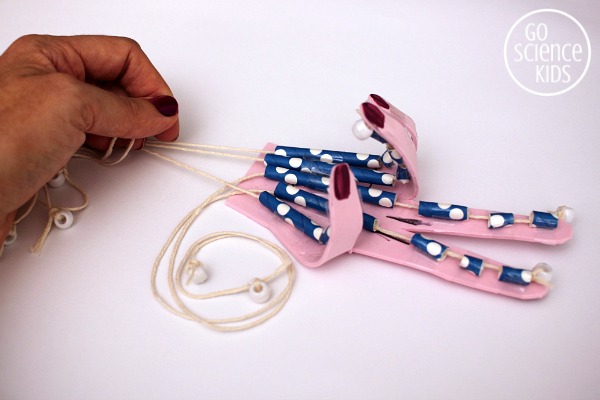
Step 3: Tie beads to five long pieces of twine. Thread each piece of twine through the straws on the finger and thumb, into the corresponding straws in the hand.
We used pony beads, but any beads would work, as long as they are large enough to not fit through the straw openings.
Make sure your twine is long enough so that you can easily pull on the other ends at the wrist. If in doubt, make them longer. You can always shorten them later on.
Step 4: Tie a further five beads to the other ends of the twine. This stops you needing to worry about the twine falling out later on.
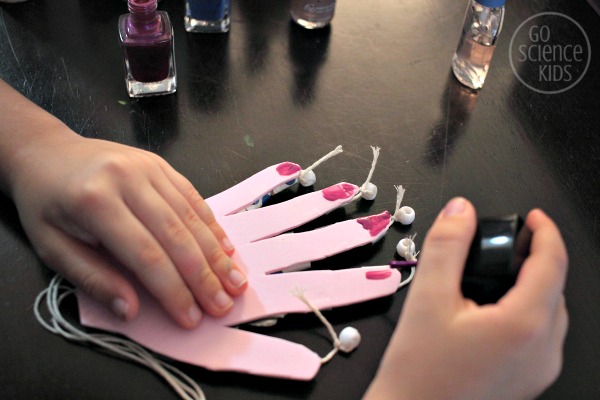
Step 6. Turn your hand over, and paint fingernails.
Step 7: Tape a chopstick to the palm to act as a handle.
This makes it much easier to be able to hold and manipulate the hand.

And now, have fun playing with your new hand! How many fingers am I holding up?

Hand Anatomy
There are 3 bones in each of your fingers, and 2 in your thumb. These bones are called phalanges. The phalanges connect to 5 bones in the main part of your hand, called metacarpals. (There are also 8 bones in your wrist called carpals, which aren’t featured in our craft.)
The muscles that move your fingers and thumb are in your forearm. Long flexor tendons extend from these forearm muscles through your wrist and palm to your fingers and thumb. The tendons slide though a snug tunnel, called the tendon sheath, which is attached to the little bones in your fingers and thumb and keep the tendons in place. When the muscles in the forearm contract, they pull on these tendons to move the bones.
The straws in our craft represent these tendon sheaths, and the twine represents the tendons. Because the tendons are connected from forearm to fingertip, if you sever a tendon at a lower joint, like Jewel did, it breaks the connection to the upper part of the finger as well.
Also in your hand are arteries and veins that transport blood to and from your fingertips. And there are nerves that allow you to feel what your hands and fingers are touching. Hands are such wonderful things!
If you’d like to see the difference that the extra gaps between the straws makes, have a look at these two shots below – the top one is Jewel’s original hand, and the second one is the one I made with larger gaps, which can bend much further.
Afterwards, Jewel took full advantage of the free access she had to the usually off-limits nail polish, and added crazy designs to her model hand. Fun! I love her artistic mind. 🙂


(In case you’re wondering, the main nailpolish we used is Covergirl Outlast Stay Brilliant Nail Gloss in Grapevine

* This post contains affiliate link(s). An affiliate link means I may earn referral / advertising fees if you make a purchase through my link, without any extra cost to you. It helps to keep this little project afloat. Thank you for your support.