
Stunning winter or indoor snow day craft that doubles as a cool crystal science lesson – how to make salt crystal paper snowflakes!
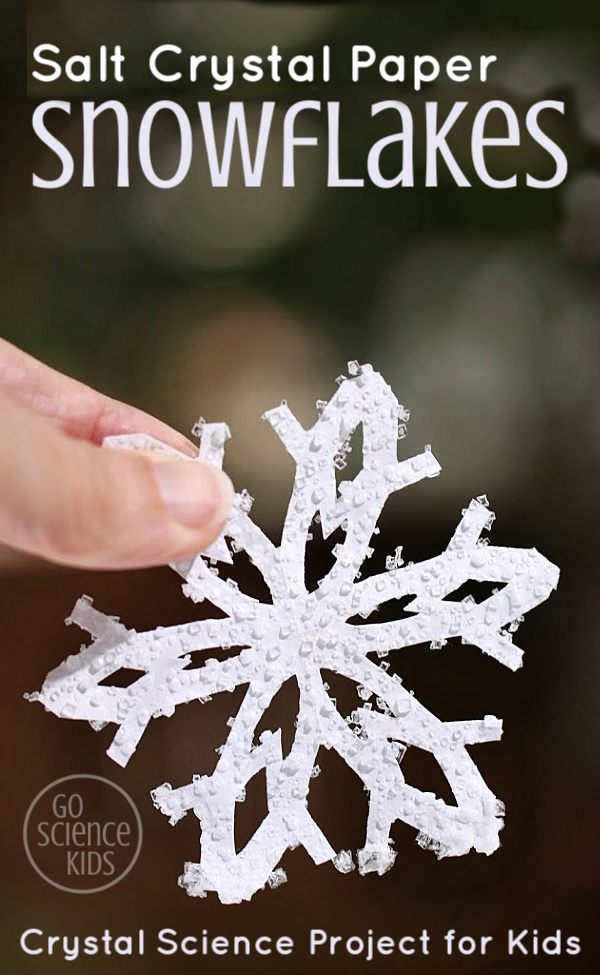

OK, I think I’m slightly addicted to making salt crystal crafts – we began with our ‘snowy’ salt crystal fir trees, then we made our salt crystal ghosts, and now salt crystal snowflakes! I think these snowflakes are my favourite so far: they’re quite stunning, and I love science projects that only need everyday household materials – no need to duck to the shops first!

Suitable for
This is would be a great activity for a group middle schoolers (8-10 year olds), who should be able to do most aspects by themselves. Younger kids (even preschoolers) can try this too, but they’ll need more help. (The salt crystal part is easy enough, but it’s actually the folding and cutting of the paper snowflakes that little kids will need the most help with). For reference, Jewel was 9 and Bumble Bee 7 when we did this.
How to make Salt Crystal Snowflakes
(Please note: affiliate links* to similar products used are included below.)
We used:
- regular white paper
- pencil (optional)
- good quality scissors (Note: “kid scissors” may not be sharp enough to cut through six layers of paper)
- table salt
- hot water
- cup & stirrer
- plate
You don’t need boiling water necessarily – hot water straight from the tap is fine (especially if you are doing this with younger kids where using boiling water would introduce the risk of scalding).
What to do
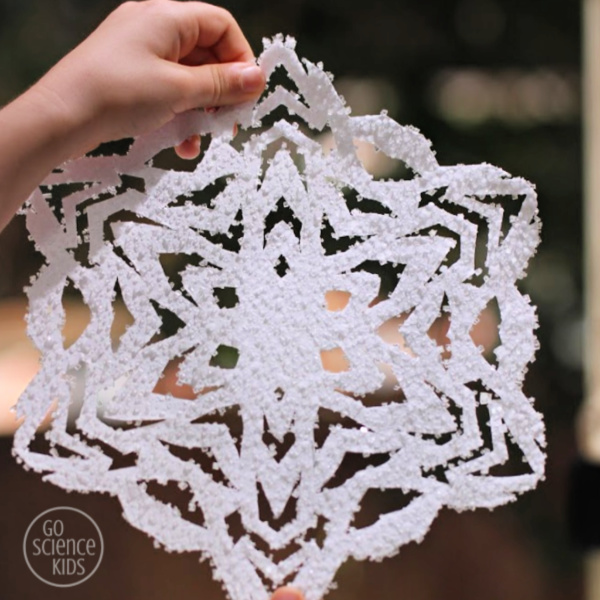
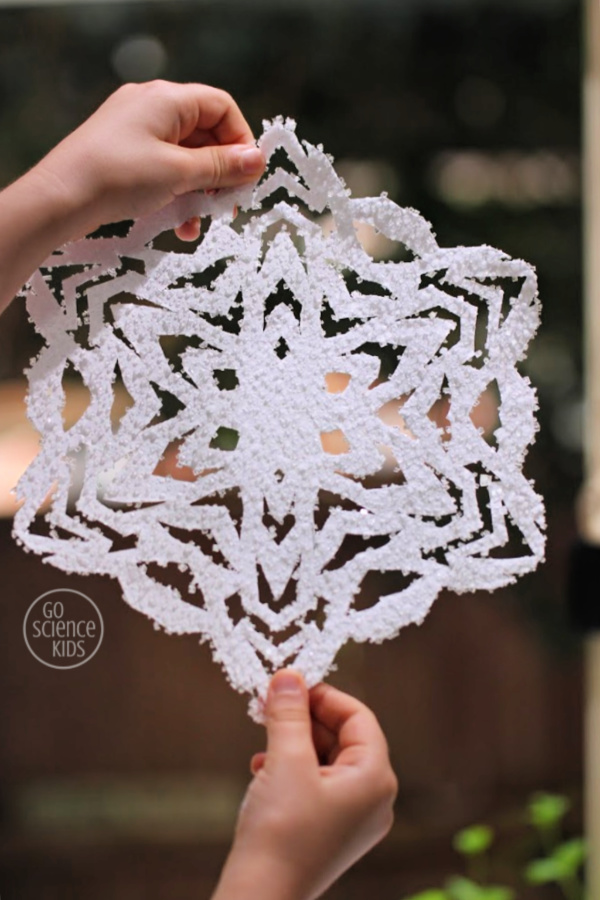
The first stage is to create a six-sided paper snowflake!
Here are the basic steps (and if you’re stuck, check out this six-sided paper snowflake tutorial for more detailed instructions).
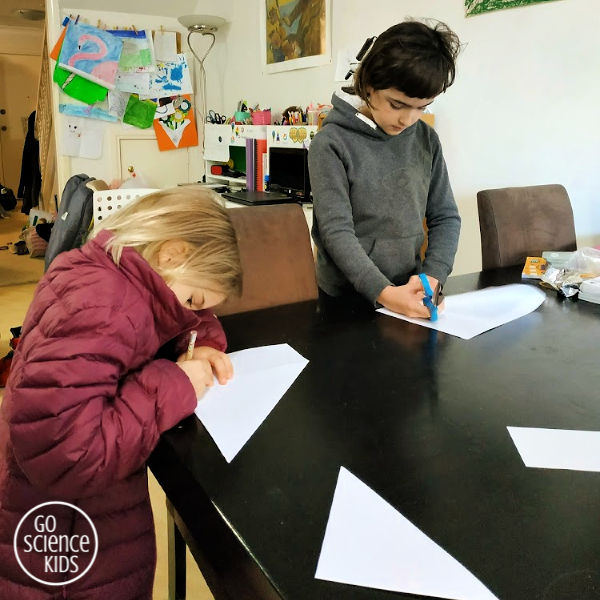
1. Cut your paper into a square. You can do this by folding one corner over until the side lines up, and then cut off the rectangular strip along the bottom. (Note: keep this strip to make mini snowflakes later on).
2. Fold your square in half diagonally, and then fold in half again. You should now have a right-angle triangle which is a quarter of the size of your original square.
3. Fold your triangle into thirds. Try really hard to get this step as precise as possible, because this will impact how symmetrical your snowflake ends up looking. The tip should end up being approximately 30 degrees.
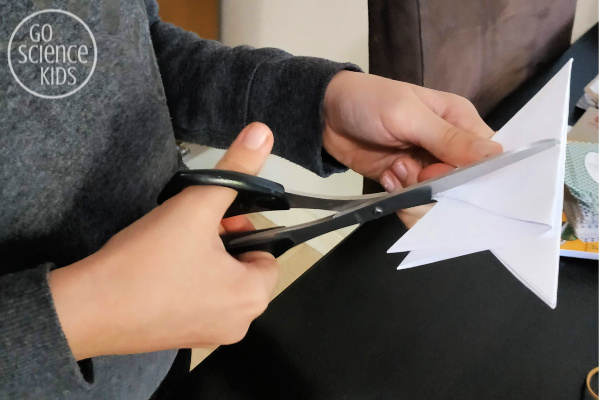
4. Cut the base off at an angle. The pointier this angle, the pointier the the points on your snowflake will be!
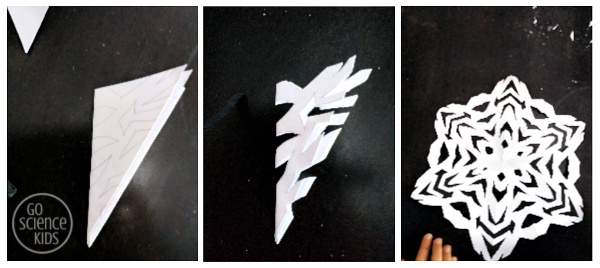

5. Design your snowflake! Begin cutting away from both sides – you can do triangles, curves, whatever you like! (Just make sure not to cut all the way across, or you’ll chop your snowflake in half!) Younger kids might like to draw their snowflake design in pencil, and then ask an adult do the cutting. (It can be tricky for little hands to cut through 6 layers of paper at once).
This second stage is the salt crystal science magic!
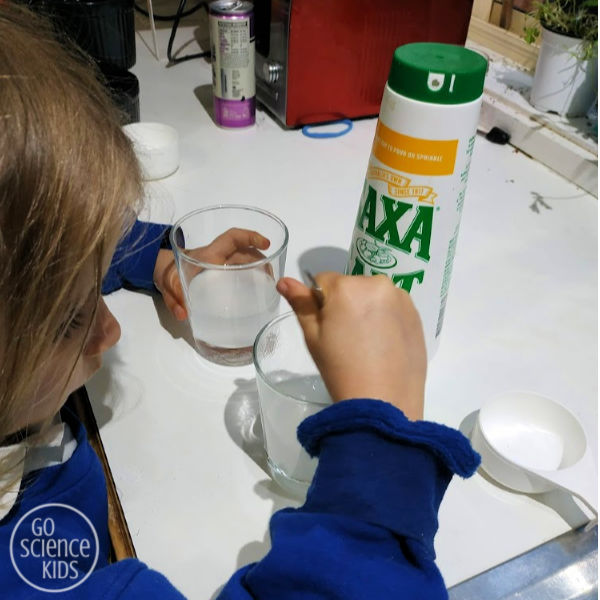
6. Add a 2-3 teaspoons of salt to a cup, and add just enough hot water to dissolve all the salt. Stir. This is the part where you can talk about “solutions” and “supersaturation” and all that fantastic science stuff! (See some Fun Facts below).
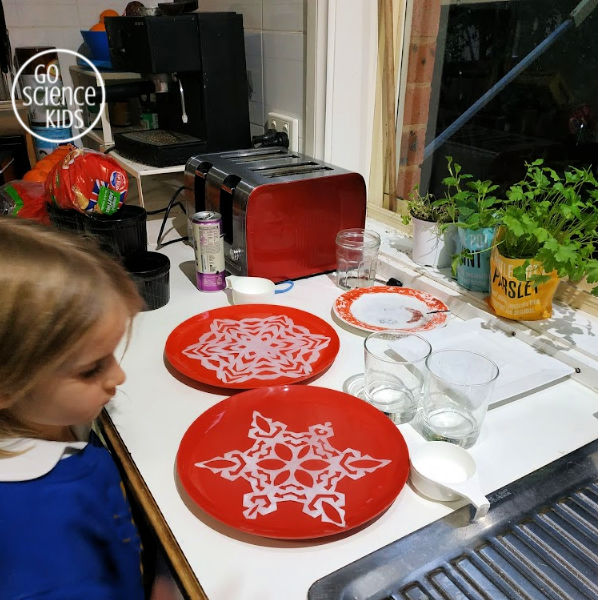
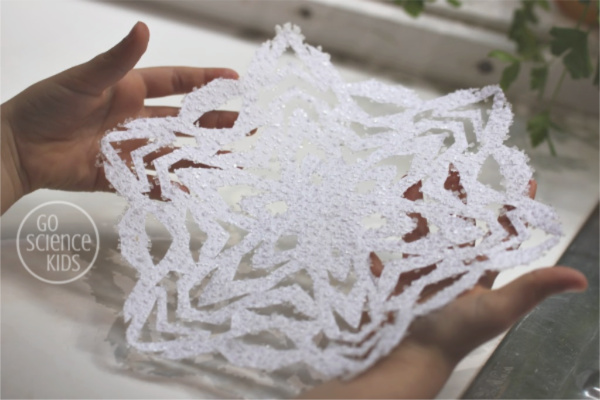
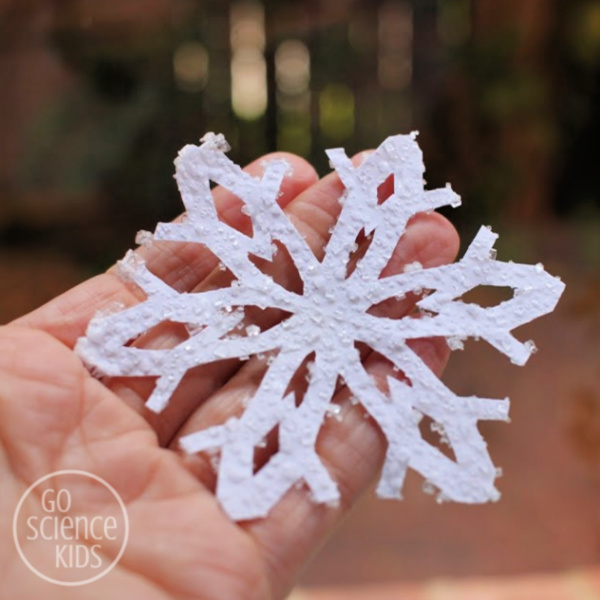
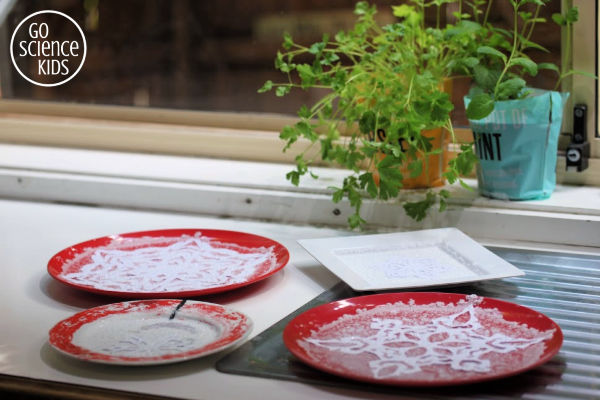
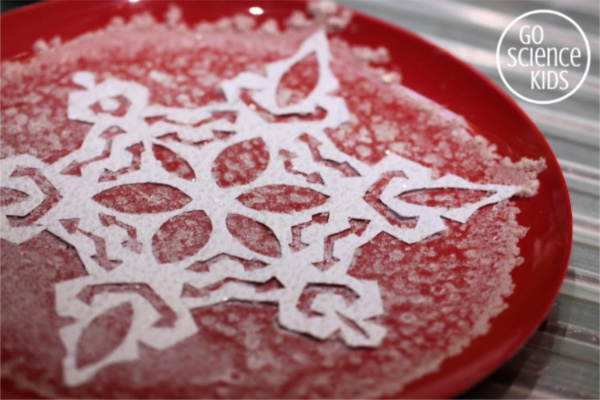
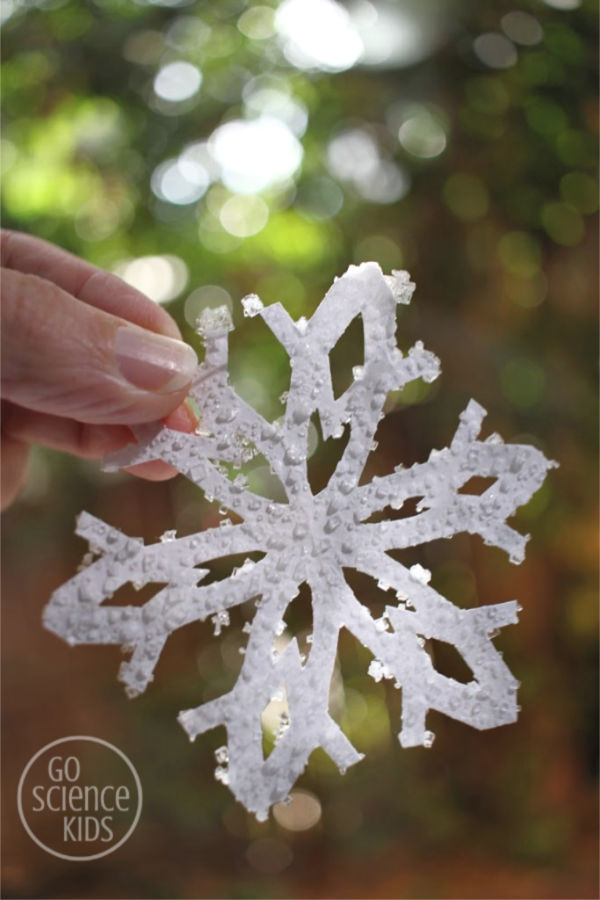
7. Put your snowflake onto a shallow plate, and pour salt water on top. Make sure all the snowflake is covered. Set aside for a few days until the water has evaporated and the salt has crystallised. You’ll hopefully notice that the salt crystals have formed into perfect little cubes! And that the crystals have formed only on the one (top) side of the paper! This is the part where you can talk about how they can mine salt from evaporated sea water…
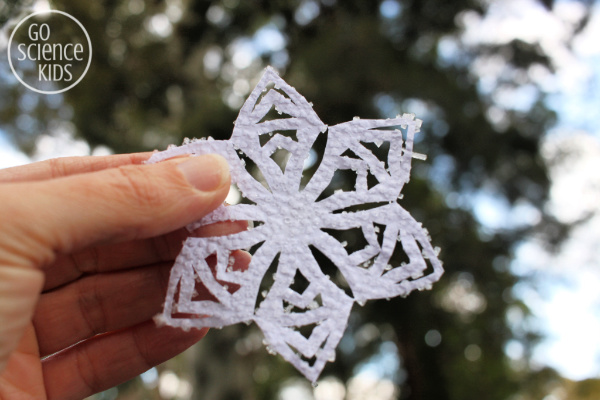
8. Display them! Salt crystal snowflakes make a great winter themed decorations. You can add double sided tape to the back and stick on a wall or window. Or you could stick a loop of ribbon or thread to the back, and hang up on your Christmas tree!
9. Make more! Remember those horizontal cut offs from when you first cut your paper square? Use those to make mini snowflakes! They’re so cute!
If your cutting skills are up to scratch, and you’d like to make really awesome snowflakes, you might like to try these Star Wars snowflakes. (We haven’t tried these yet, but wouldn’t they look cool!

Fun Science Facts
In nature, all snowflakes are six-sided (or have six points) because of the way they are formed. The molecules in ice crystals join to one another in a hexagonal structure, an arrangement which allows water molecules – each with one oxygen and two hydrogen atoms – to form together in the most efficient way.
Salt (sodium chloride) dissolves in water, because of the polarity of the water. Positive sodium ions bond with the negative part of the water molecule, and negative chloride ions bond with the positive part of the water molecule.
Salt crystals are cubic. You can see this with the naked eye, but it’s also fun to study under a microscope or magnifying glass if you have one too.

Please note…
All kids’ activities on this blog require attentive adult supervision. Parents and carers will need to judge whether a particular activity is appropriate their child’s age and skill level. Click here for more information.
You can find more ideas on our Christmas science and crystals category pages, including:
- how to make Borax crystal snowflakes
- how to make a ‘snowy’ salt crystal tree
- Make a cool crystal snowman
- how to make a Christmas tree magnet maze
You might also like to follow our Go Science Kids and Fun Science for Kids boards on Pinterest.
And, of course, you can always subscribe to our newsletter, to receive all our latest activities straight in your Inbox. We’d love to have you join us!
* This post contains affiliate link(s). An affiliate link means I may earn referral / advertising fees if you make a purchase through my link, without any extra cost to you. These fees help keep this blog afloat. Thank you for your support!