How (and why) spiny leaf phasmid insects make fun, easy and educational pets for young kids. They’re a great way to encourage an interest in entomology and a love of nature.

We’ve had pet spiny leaf phasmids (a type of camouflage or stick insect) for about 4 years now. They make awesome pets! Let me share with you why I think they’re awesome pets for kids, and how to look after them easily (and cheaply).
Suitable for
Spiny leaf insects are a great pet option for kids of all ages.
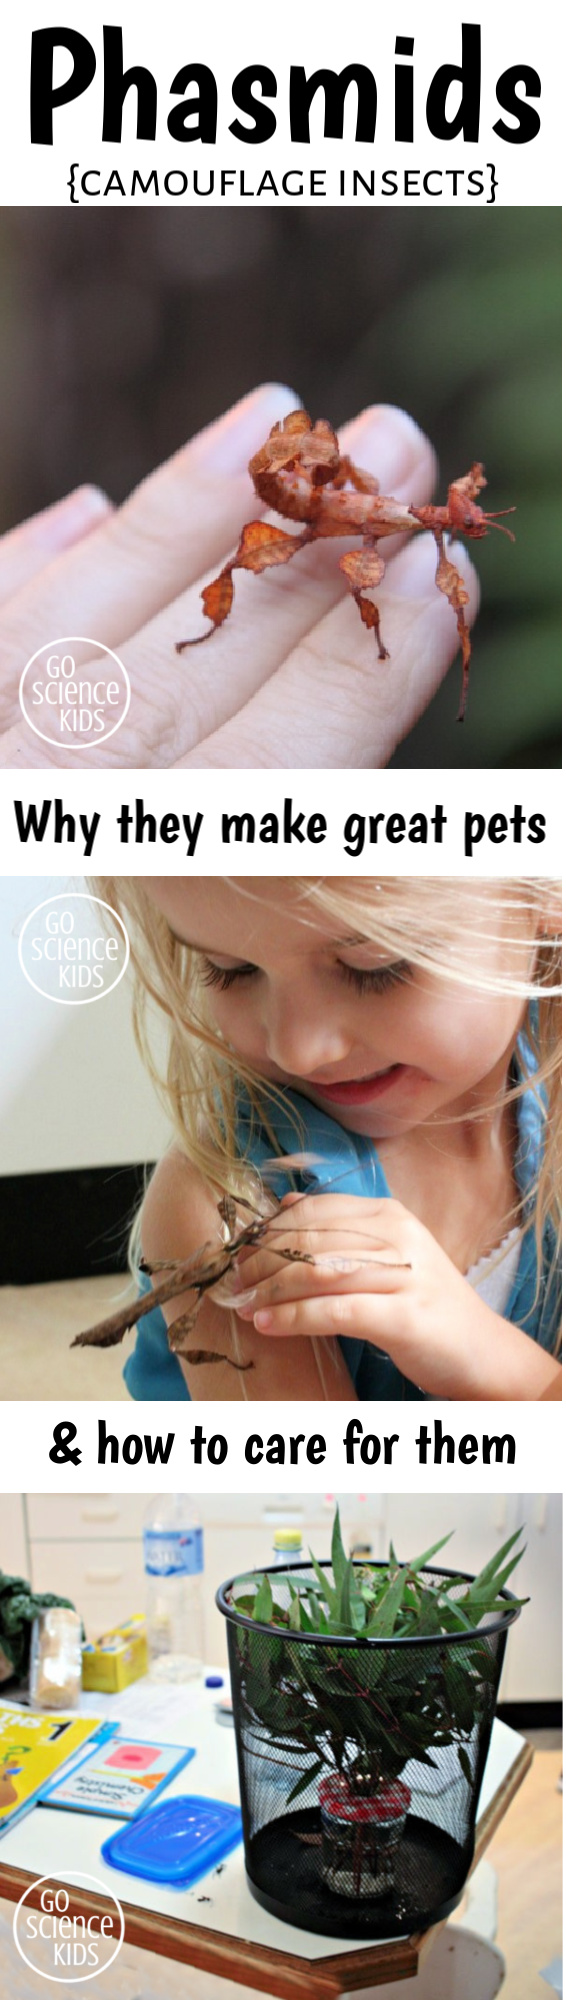
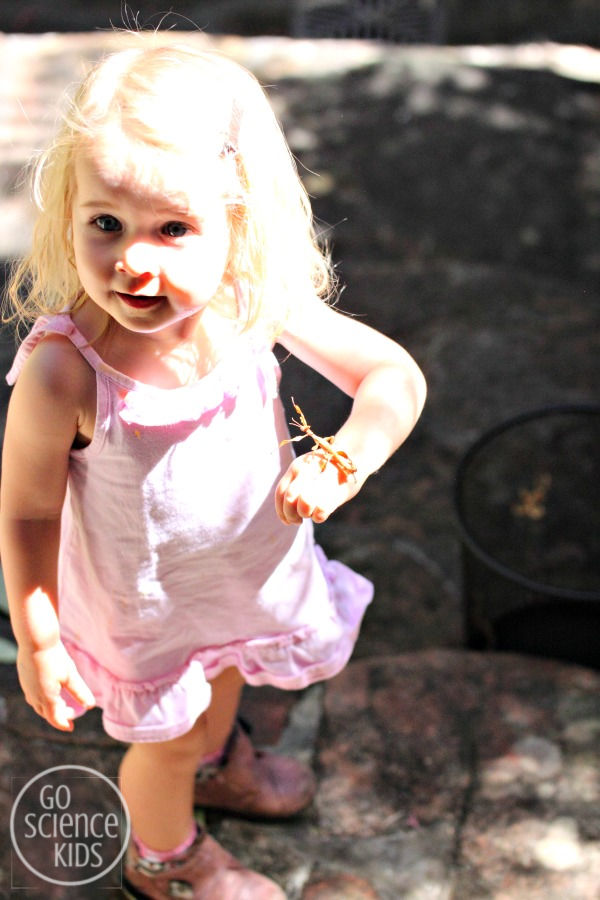
Babies and toddlers can safely watch them inside the enclosure, which can be brought down to their level, and then put back out of reach again. Once they are able to be gentle, they can stroke them or let them walk on their clothing or arm. (My youngest daughter was about 1.5 years old when we first brought phasmids home. She loved them then, and still does now!)
Phasmids are also great for preschoolers. I’ve brought phasmids in to visit preschool on several occasions. The kids can study them through the enclosure, and those brave enough can take turns handling them (with close supervision).
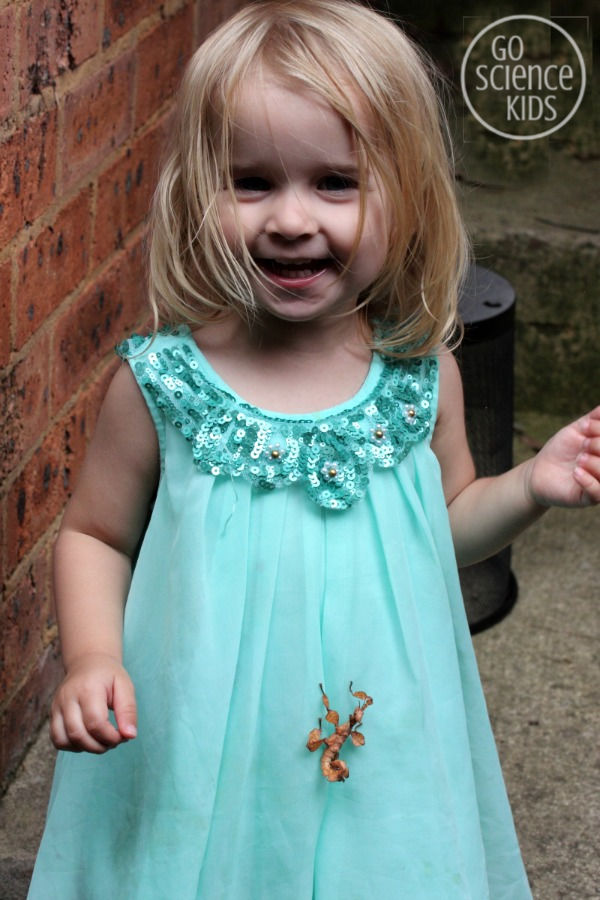
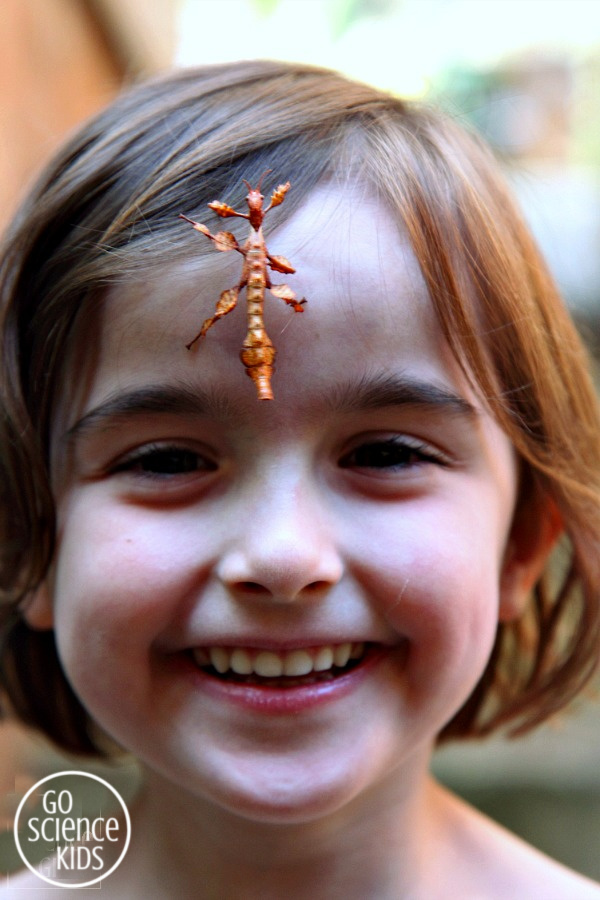
Phasmids make great pets for older kids too – who might take on more of the responsibility of caring for them. My eldest daughter is 7 years old now, and she still loves showing off her pet insects to her friends (although she hasn’t quite taken on the responsibility part yet!)

Having phasmids as pets is a great way to expose kids to biology (the study of living organisms) and entomology (the study of insects) in a caring and nurturing way. They’re safe for little kids to touch, as they don’t bite or sting. Plus, did I mention they’re easy to look after?
But first, in case you’re wondering what on earth phasmids are?
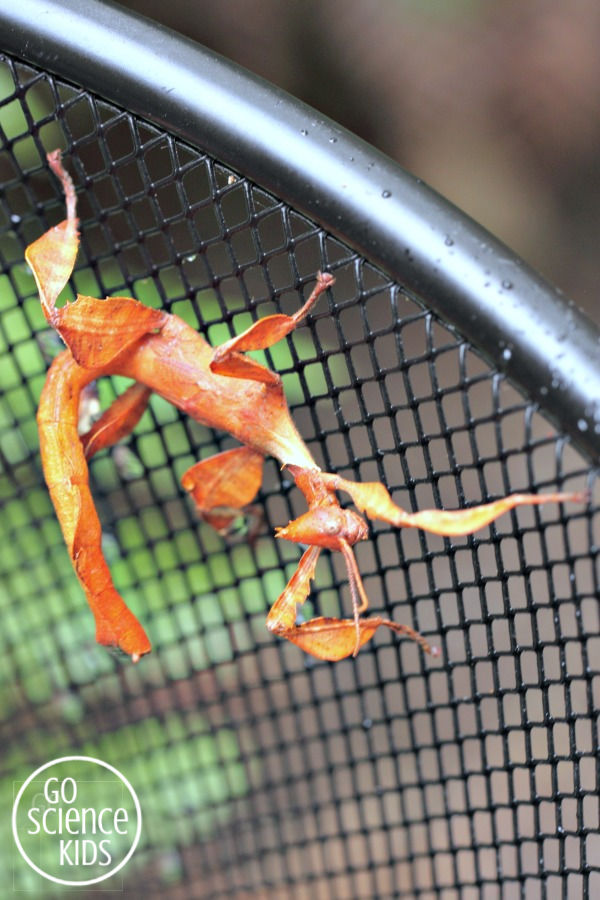
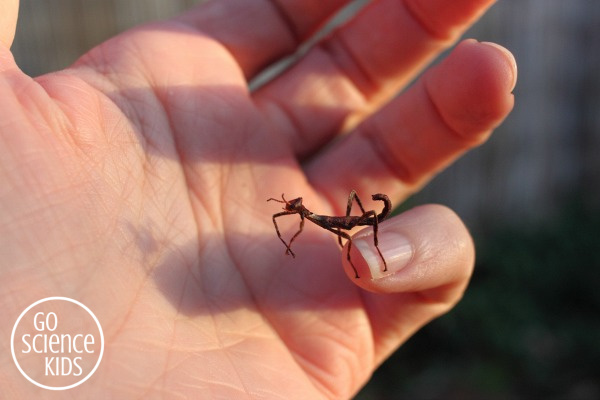
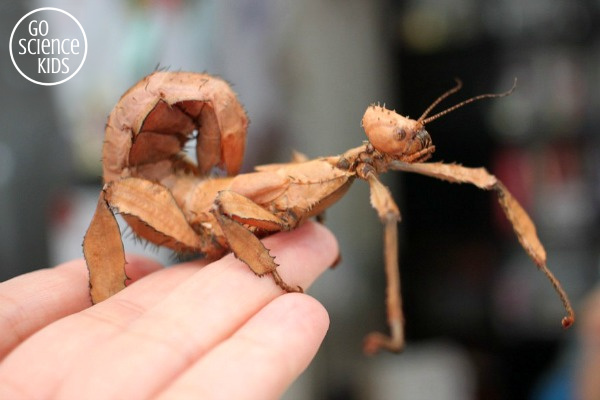
Phasmids are insects that eat leaves, and resemble leaves or sticks for camouflage. There are about 3000 species of phasmid worldwide. Many are referred to as stick insects, stick-bugs or walking sticks. The ones we have are spiny leaf phasmids (also known as Macleay’s Spectre).
I can show you how to set up a DIY portable phasmid enclosure, for just a few dollars! But before we get into how to look after them, let me tell you a little bit about them – they’re really cool!


The {Fascinating} Life Cycle of a Spiny Leaf Phasmid
Spiny leaf phasmids go though an incomplete metamorphosis – that is they have only three stages of their life cycle: egg, nymph and adult. But there’s two really cool things about spiny leaf phasmids: the relationship they have with the ants, and how they can clone themselves! Let me explain….
Egg:
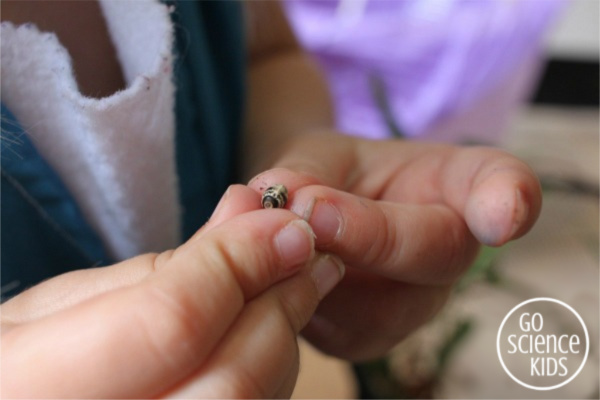
Adult females lay a single egg, about once a day or so. These eggs have a sweet knob on one end. In the ‘wild’, eggs fall to the ground, where they are picked up by ants, and carried back to their nest. The ants eat the sweet knob (yum!), and leave the rest of the egg in their nest, thus offering the egg protection from predators who might be leery of an ant bite. Ant nests are also sandy, which provides the eggs with the dry environment they need to hatch. Baby nymphs look, and act, very similar to red-headed black ants (but with curlier tails) which is their first form of camouflage.
This relationship with ants is called a “symbiotic relationship”. Both species benefit – the ants gets a free meal, and the phasmids gain protection, an appropriate egg-hatching environment, and initial camouflage.
Nymph:
Nymph spiny leaf phasmids leave the ants nest and quickly climb a tree, where they’ll spend the rest of their lives. They eat leaves, and drink rain drops or dew. They first molt (shed their outer skin or exoskeleton) when they are a just few days old, and change from looking like an ant, to looking like a dried up old leaf. If scared, they sway, to look like a leaf blowing in the breeze. They continue to grow and molt until they reach adult size.

Adult:
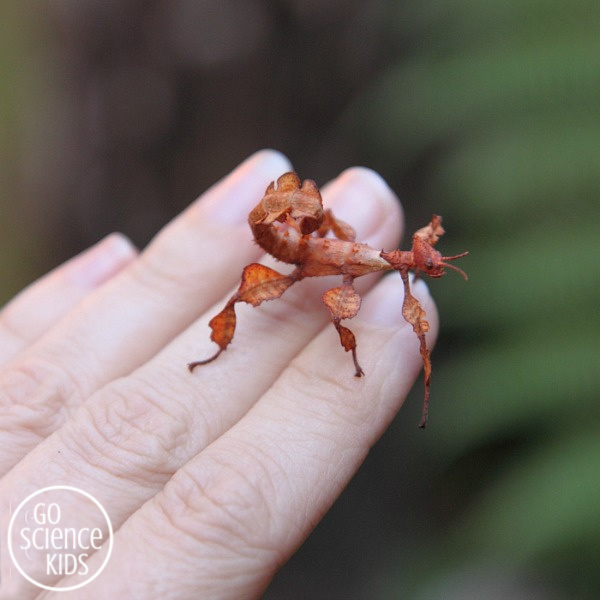
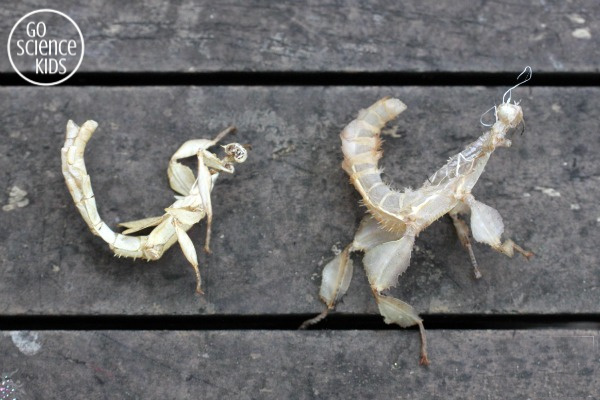
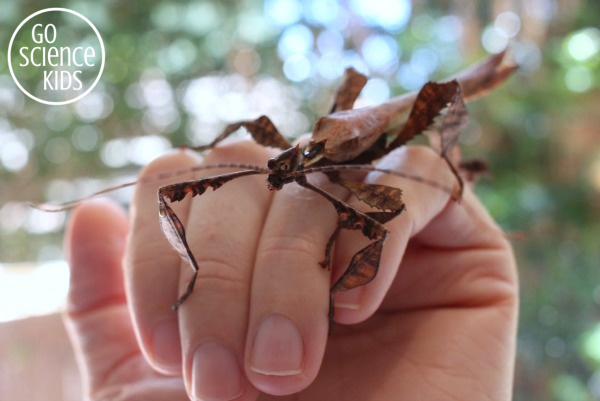
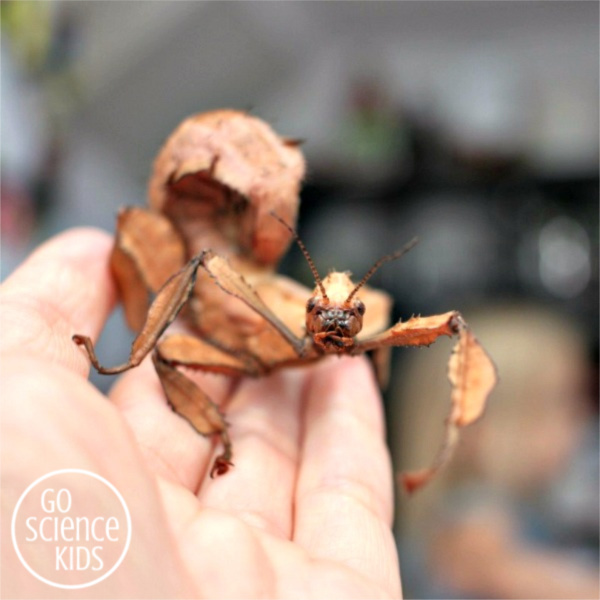
Spiny leaf insects change in appearance quite significantly with their last molt. The adult males are dark grey/brown colour, with thin straight bodies and long wings. They can fly short distances. The females are much larger, with thick clay coloured bodies with spiky lumps along their backs, a curled tail and very small wings, which are ineffective, as the females can’t fly. But here’s another cool bit. Adult females lay about an egg a day, but they don’t need a male to fertilise them necessarily, because they’re able to clone themselves, in a process called parthenogenesis. (So cool!) With spiny leaf phasmids, only female offspring can be produced through parthenogenesis. (Fertilised eggs on the other hand, can produce either male or female offspring).


But what makes spiny leaf phasmids such great pets?
I’m glad you asked!
One reason they’re great as pets is because they’re safe for little kids to handle. They don’t bite or sting. Their whole defence mechanism is camouflage – so if they get scared, they just sway trying to look like a leaf in the breeze.

The only tricky thing is that they are rather fragile. You have to teach kids not to use their fingers to pick phasmids up (lest they squish them or tear off a leg), but rather to let the phasmid walk on themselves.
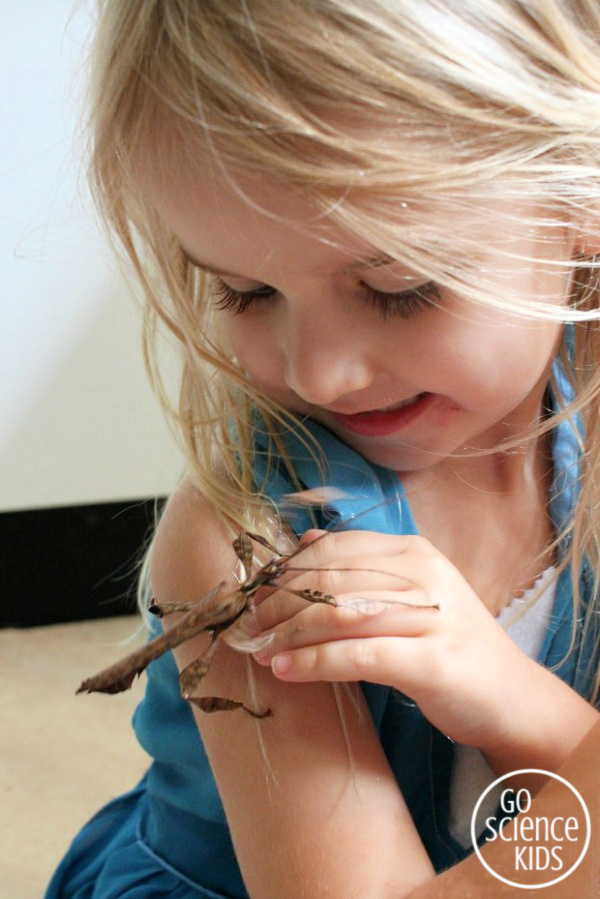

Phasmids instinctively want to move forwards and upwards, so if you just put your hand (or any other object) slightly above and in front of them, they’ll generally step up of their own accord. And they are very good at hanging on, actually preferring to be vertical or upside down.
Some kids don’t like the feeling of phasmids walking on their skin – it can feel like a tickle (for younger nymphs and males) or feel a bit prickly (for the adult females). Many kids might prefer to just look, tough gently with their finger, or let the phasmids walk on their clothes instead of directly on their skin. If a leg does get torn off (eep!), phasmids can actually regrow their lost limbs (which is kinda cool in an unfortunate way.)
Another reason spiny leaf insects make great pets is that they don’t need much day-to-day care. Once you have your enclosure set up, it takes about 20 minutes, 2-3 times a week to replace their leaves and clean out their enclosure, plus a few seconds a day to give them a quick water spray to drink.
A third reason, is that looking after phasmids encourages kids to love nature! These insects are a great gateway to learning about habitats, life cycles, metamorphosis, the food chain, parthenogenesis, insect body structure, camouflage, and much more!
A fourth reason, is that its really easy to make a light-weight and portable enclosure. Our enclosure is light enough that my 4 year old can hold it on her lap in the car. This means you can take your phasmids with you to visit preschool! It also means you can take your phasmids to a friend’s house for them to pet-sit while you’re on holidays (or you could even take your phasmids on vacation with you.)
How to set up an easy, portable (and affordable) phasmid insect enclosure
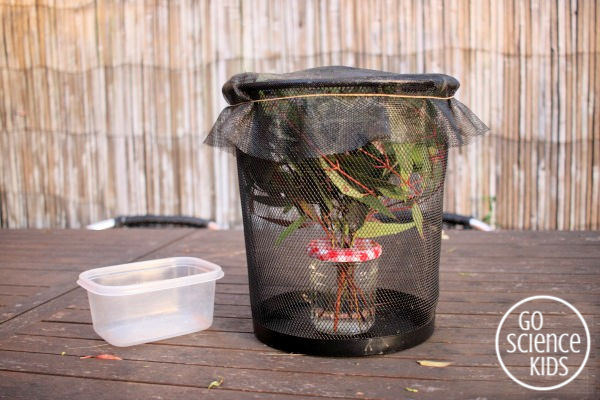
We’ve tried out several different phasmid insect enclosure designs over the past few years, and below is the type we’ve found to be the most effective. This design lets you keep the phasmids indoors, gives easy access to replace the leaves, allows lots of air flow, and is light-weight and portable.
You’ll need:
- A mesh waste paper bin / wastebasket (like this black one – or if you’d prefer fashionable pets, you might prefer to buy one in pink, silver, red, or white!)
- Basic insect screen mesh (similar to this) and a large rubber band (like these)
- an upcycled jam jar with a narrow opening (or make a narrow opening by hammering a hole in the centre of the lid)
- sticky tack (like this)
- basic water spray bottle (like this)
- secateurs or pruning shears (like these) and a nearby eucalyptus tree with healthy low-hanging leaves
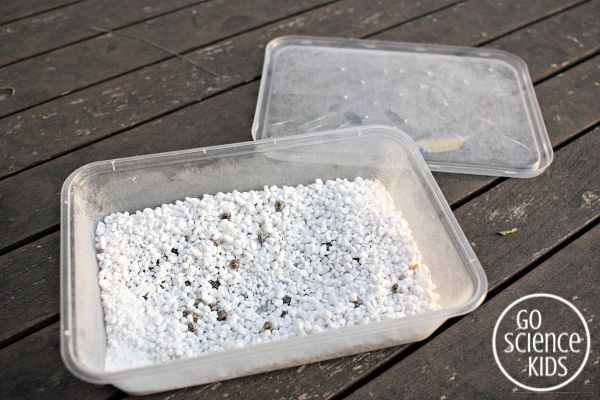
- A plastic container partially filled with river sand (or vermiculite), with air holes punched into the lid (optional – only needed if you have adult females and wish to collect eggs)
You’ll probably have many of these items at home already. The only things we had to buy were the a wastebasket and a piece of fly screen mesh, which we picked up from our local hardware store for under $10. Not a bad price for a new pet enclosure, don’t you think?
Before we set our enclosure up, I first hammered a hole in the jar lid (making sure not to leave any sharp edges), so that we’d have a hole large enough to put branches in easily, but not too large that the nymphs might drown. If you want to skip this step, try to find a jar that has a narrow opening at the top.
To make your enclosure:
Fill the jar with water, screw on the lid (if using), and tack the jar to the bottom of the wastebasket. Add fresh branches of leaves.
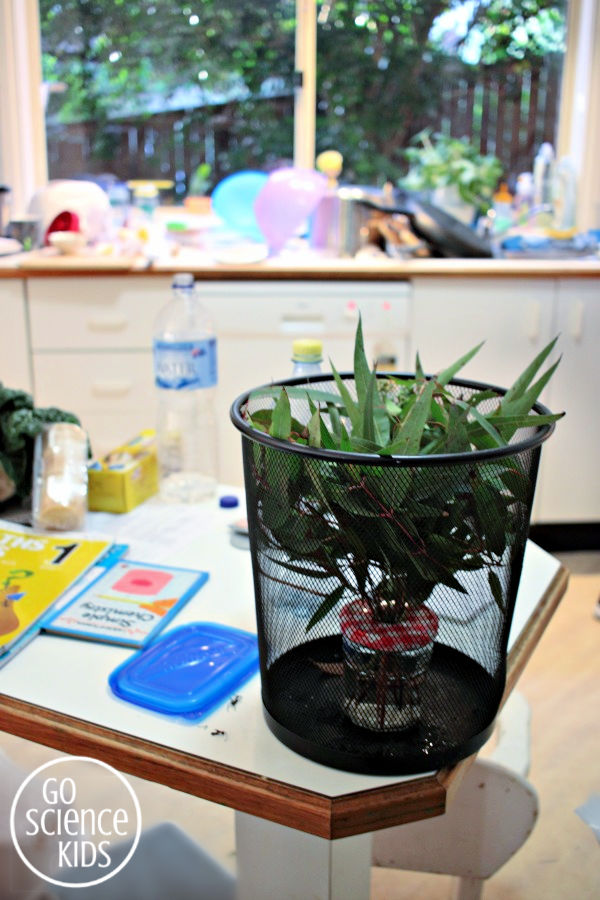
Cut a large circle of insect screen mesh and secure to the top of the wastebasket with a large elastic band.
Double check that there is enough vertical space in your enclosure for your phasmids to hang freely from a branch while they molt. And then add your insects! The mesh makes it easy for them to climb all over the enclosure, and it enables lots of fresh air.
You’ll need to spray your enclosure with water several times a day. I set my spray bottle to mist setting, and spray straight through the mesh. The phasmids drink the tiny droplet as if they were dew. (Please make sure you use a new or clean water spray bottle – that is, not one that might have had any previous cleaning products inside, or you might poison them!)
Also, speaking of poisoning, remember to not use insect spray anywhere near your enclosure!
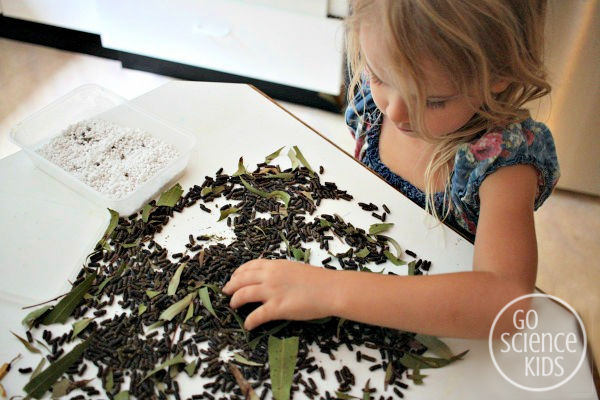
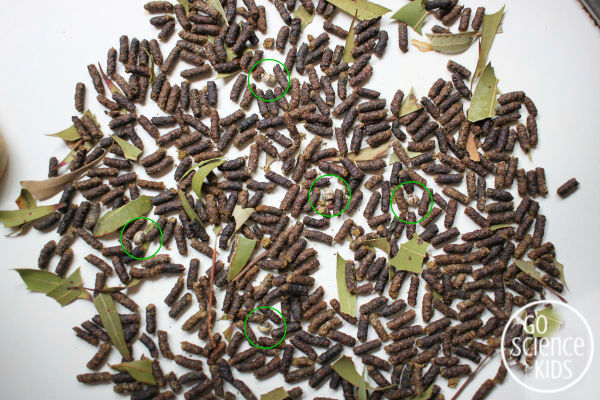
Change the leaves every 3 days or so (although you can leave it longer at a pinch), and replenish water in the jar to keep the leaves fresh.
Regularly clean up the phasmid poo (which look like little brown pellets). If you have adult females, you can also collect eggs. Store the eggs in a plastic container with river sand (or vermiculite, as we use). Add holes to the lid of your container to allow air flow. In spring, leave the container on a windowsill in the sunshine, and spray gently with water every few days, and you might get some nymphs hatching next spring! (Be patient though – some eggs can take up to 2 years to hatch…)
For more information:
- The two articles Care of Stick Insects and Leaf and Stick Insects: Order Phasmatodea by The Australian Museum are a great information source for keeping phasmids in a home or classroom environment.
- ABC’s Creature Features has a Spiny Leaf Insects page with a quick summary on caring for pet phasmids for kids.
- We received our spiny leaf insects from two friends, both of whom have successfully bred them in their home enclosures. According to the internet you can buy some online here. I’ve also seen some for sale in our local pet stores!
* This post contains affiliate link(s) to similar products used. An affiliate link means I may earn a referral fee or commission if you make a purchase through my link, without any extra cost to you. It helps to keep this little project afloat. Thank you so much for your support.